...but until then, I'm keeping a pretty frantic pace.
I finally printed out a few planner pages (thank you, donnayoung.org, for all the printable calender and planner pages I could ever use) today because the jumble of things I need to do in the next two months was causing some severe sleep deprivation. Putting the mess on paper got it out of my head so that I can sleep at night. Yesterday afternoon, as I began to fade out after only 3 hours of sleep the night before, I decided to make coffee. Generally I drink one mug of half-caff in the morning and that's it. Well, I brewed up half a pot of very strong Ethiopian coffee and drank three mugs the size of a soup bowl (thanks, Annita, for the new mug--it'll be handy for morning coffee or soaking my tired feet in). I got pretty wired; Una said I was vibrating...
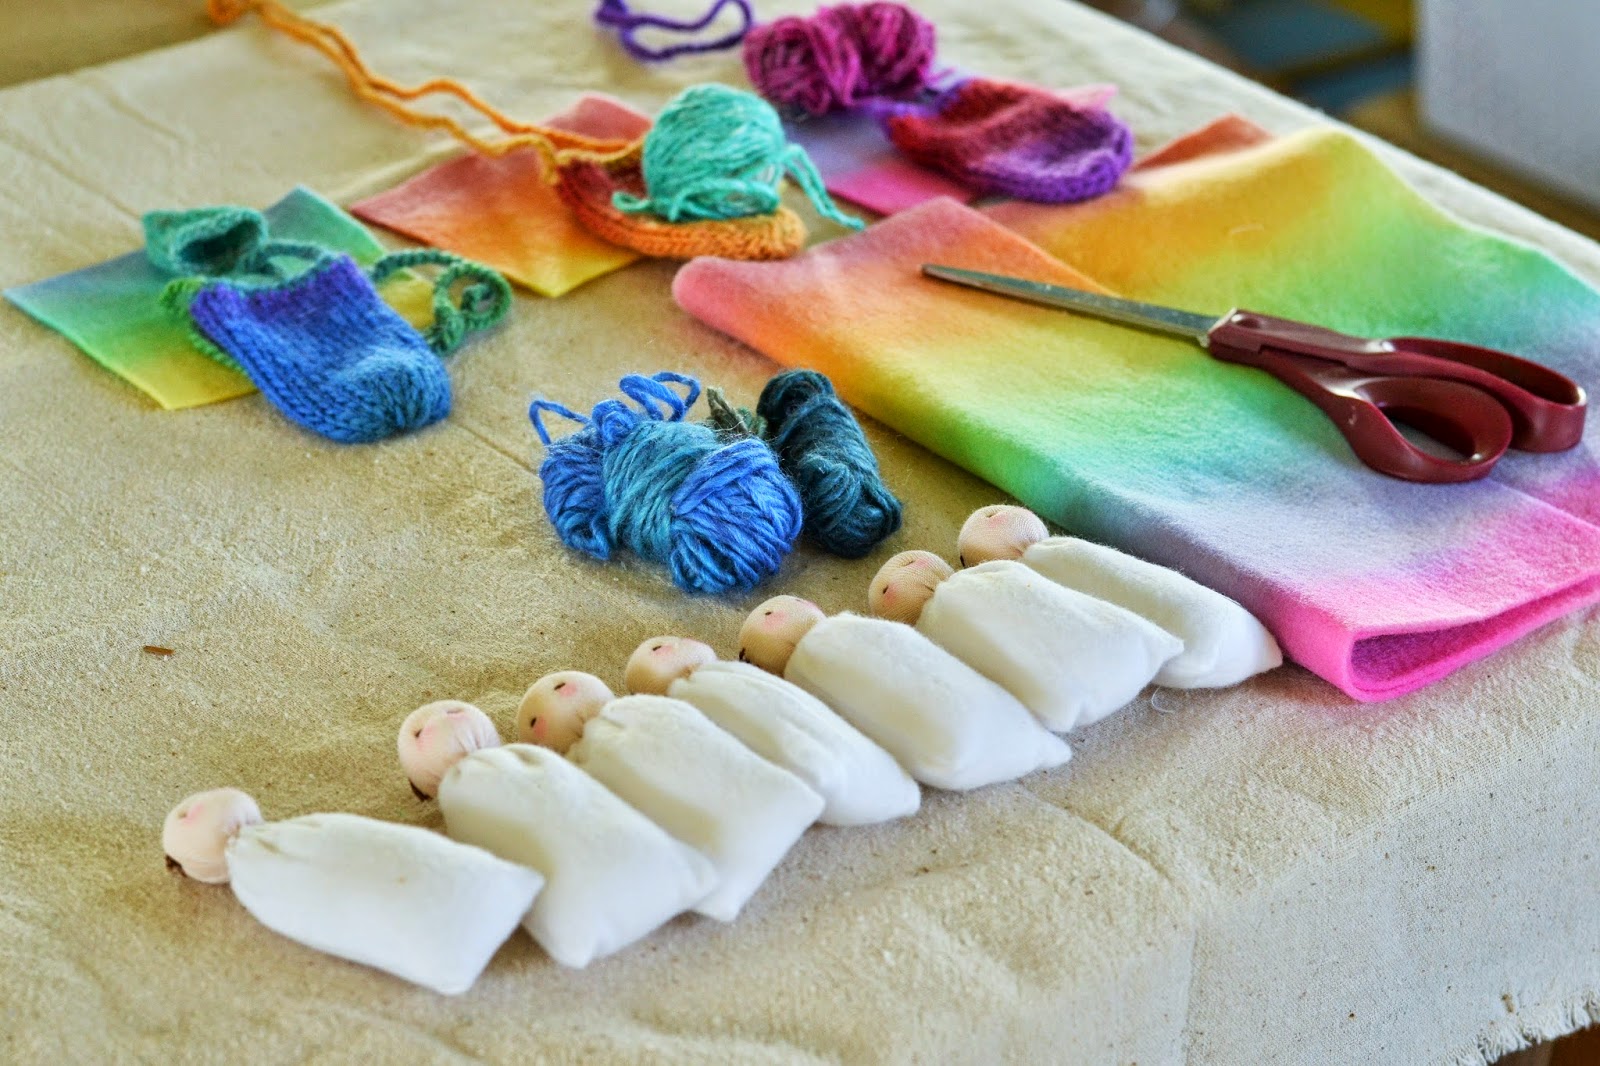
Much of what's on my mind is related to Christmas. Making things for the shop and for the kids. I finally finished these little pocket gnome-babies and got them listed in the shop, with a couple put aside for Gemma and my niece. I think they turned out well, the proof being that my boys, right up to my soon-to-be 12 year old, all love them and ask, "Can you make one for me?")
I'm sharing this on Keep Calm, Craft On {Crafting On}, on Frontier Dreams and Creative Friday on Natural Suburbia. So...what are you working on for Christmas?
Showing posts with label crafts. Show all posts
Wednesday, November 12, 2014
Tuesday, October 28, 2014
Crafty
Never an idle moment in the last quarter of the year!
The days have been passing in a blur as every moment not spent on home, hearth and schooling has been dedicated to crafting. Some of it is knitting, some of it sewing, and it has been pretty equally divided between making things for our Etsy shop, Frost Lane, and making Christmas gifts. I have made wool dryer balls from these instructions, for myself and as gifts. The little autumn babies tucked into walnut shells are in our shop now awaiting adoption, and I have made a number of cherry stone heating pads/ice packs for the shop as well. Currently in production are the "Pocket Babies." I have to attach their little gnome hats and wrap them in their felt blankets, but I hope to have them in the shop soon--with a couple put aside as gifts for a couple of special little girls I know.
I'm linking up with Frontier Dreams (Keep Calm, Craft On)...
Labels:
autumn pleasures,
Christmas,
crafts,
Etsy shop,
Keep Calm Craft On
Tuesday, September 30, 2014
Crafts for the shop
I've spent the past week making things for our Etsy shop, Frost Lane. It's been a while since I've done any crafts (I'm a wee bit put out by the fact that only my youngest two like playing with craft materials when I have an assortment of them that would stock a small craft supply store!) I worked on wood-burning some one inch buttons, made some more toadstool-pendant necklaces and made some little autumn gnomes with acorn cap baskets. I think they came out really well! I hope to have them in the shop later today...
Tuesday, July 16, 2013
Gemma Eliana is four!
I've been lazy about getting photos up of Gemma's birthday on Sunday, but here they finally are! Since my pretty cakes with butter cream frosting are almost always too sweet for the family, I decided to do a yellow vanilla cake with whipped cream and berries, and it went over very well. The candles were hand-dipped beeswax, left over from Sebastian's birthday, when he dipped his own birthday candles.
I made that birthday crown for her second birthday. It makes me teary to compare the photos from two years ago. The little ones become big ones so quickly! In the last couple of weeks she has learned to pedal her tricycle, swing herself on the swing and whistle!
My main gift to her was a doll outfit for her boy doll, William: a shirt, jeans, cardigan, hat and booties.
Bret's gift to her beat all. I showed him some pictures and gave him some ideas, and he did the rest. I don't know if he can ever top this one. It is absolutely awesome!
Along with the play dishes from Gemma's auntie and Oma, the thing is irresistible, even to the boys! She also got a bath toy from a dear friend in North Carolina and I made her a pair of pajama bottoms and a skirt as well.
We are all crazy about you, Gemma--you bring such light and sparkle into our home!
Friday, January 4, 2013
Creative Friday: a dozen beanbags
Here is one of my hand-made Christmas gifts that turned out to be an unexpected hit: two sets of six beanbags (actually they are filled with rice). My four boys have used these for mock battles (they build pillow forts at opposite ends of our hallway and try to shoot them down) and various other games they've come up with. The bags are made to put up with a great deal of abuse--double bagged in muslin--and filled with 8 oz. of the cheapest rice I could find. The numbers, printed onto iron-on transfer paper, were added for two reasons: first, it makes it easy to see if any are missing, and secondly, the bags can be divided for teams, which is what we have during fort-battles.
Since getting these, the boys have stopped hurling the 3 lb rice-filled heating pads at one another!
Join Linda on Natural Suburbia for more Creative Friday inspirations...and have a great weekend!
Friday, December 7, 2012
Creative Friday--crafting for Christmas
Advent is always marked by a flurry of Christmas crafting around here! I have been furiously knitting since October, and for the last few weeks it has just been hats for the menfolk in the family...I still have one to do for my husband, and then I may attempt to knit up a couple of pairs of requested fingerless mitts.
There are other holiday gifts for the kids in the works which for obvious reasons cannot be mentioned here.
I haven't had time to make all the things I had intended to make for our Etsy shop before Christmas; I'd had plans for St. Nicholas dolls and tree ornaments and such, and just can't manage it. I did manage to make two stockings from this adorable fabric, and they are available at Frost Lane. I used the scraps--too cute to toss out--to make a few little stuffed ornaments for our tree. They are backed with red felt.
I have loads to do and so many fabulous ideas (Pinterest is killing me!), that the days are too short and too few between now and Christmas.
So...what have you been up to? Drop by Natural Suburbia for Creative Friday and to see all the fabulous things being crafted!
Wednesday, August 29, 2012
Yarn Along--divided
My time has been so divided lately that all things seem to take forever to complete. Seriously, how our "hostess", the illustrious Ginny at Small Things, whom I am joining here for this week's Yarn Along, manages to do it all and do it all well...well, it baffles me! Maybe it's my age...I think I am slowing down...
There just are too few hours in a day to blog, cook, knit, read, write, run an Etsy shop and home school. Right now the focus is getting ready for the school year and getting the house in some semblance of order before said school year begins. Creatively, I have been more focused on writing lately, and of course that dips into my knitting time. And my reading time. Consequently, I haven't looked at a book--other than school-related--or picked up my Kindle in a couple of weeks. I have, however, been perusing the archives of Dappled Things, a Catholic literary magazine of high caliber. There is some really wonderful writing there.
Progress on my February Lady Sweater remains slow. I am, however, finally on the bottom border, so the rest will be moving along more quickly.
And I am knitting a slew of hats for Christmas. I have requests for hats and fingerless gloves and cowls, and it makes me wish I could knit reeeeeeealllly fast! This one above is for Dominic. It is called Graham, and the free pattern is here. The yarn? Well, it is an acrylic from my stash, since we are sans employment again (another lull at Bret's cabinet shop. Let's hope this one doesn't last 3 years!) and nice yarn is not in the budget right now. Still, it is a better-than-average acrylic and feels thick and soft, and it doesn't hurt my hands to knit with it.
I haven't had much time to drop in on everyone and see what you all have been knitting, but if I find a little time later on today, I sure am curious!
Tuesday, August 21, 2012
Another 2-hour project completed in a mere 5 months!
Another three-tiered skirt for Una. She loves the first one I made some time ago, and I thought I'd make her another. I think I bought the fabric back some time in March, hoping to make it for spring and summer, but it seems it will be a late summer/early autumn skirt instead. I found the easy directions here.
Friday, July 27, 2012
Cutlasses for a pirate party
Making wooden toys for our Etsy shop is frequently a family affair. Bret cuts them out and routers them, and does the primary sanding, the kids help with the finish sanding, and I am in charge of the shop and the packing and shipping. We just had a large order in for a "Party Pack" of twenty cutlasses. It was lovely to send them on their way...
For more creativity and inspiration, visit Creative Friday on Natural Suburbia.
If you haven't done so already, please do enter my giveaway from Armadillo Dreams this week! They are giving away the most adorable chicken family!
Friday, June 29, 2012
Decompression Crafting
This time of year is crazy. I am trying to "finish" this school year (I school pretty much year round, but our umbrella school requires grade reporting and I need to sort of assess where we are in order to figure out what we are doing next), prepare for two birthdays and get ready for another school year, this one with the added stress of planning Una's high school years. Ugh. I obviously have absolutely no time to be working on crafts--other than those that are birthday-gift related--but that is how I decompress when I feel sort of ready to burst at the seams. I suddenly develop this overwhelming urge to escape to my workroom and sit at my workbench or at the sewing machine. Which explains why, in the midst of all that I should be doing, I have been doing this:
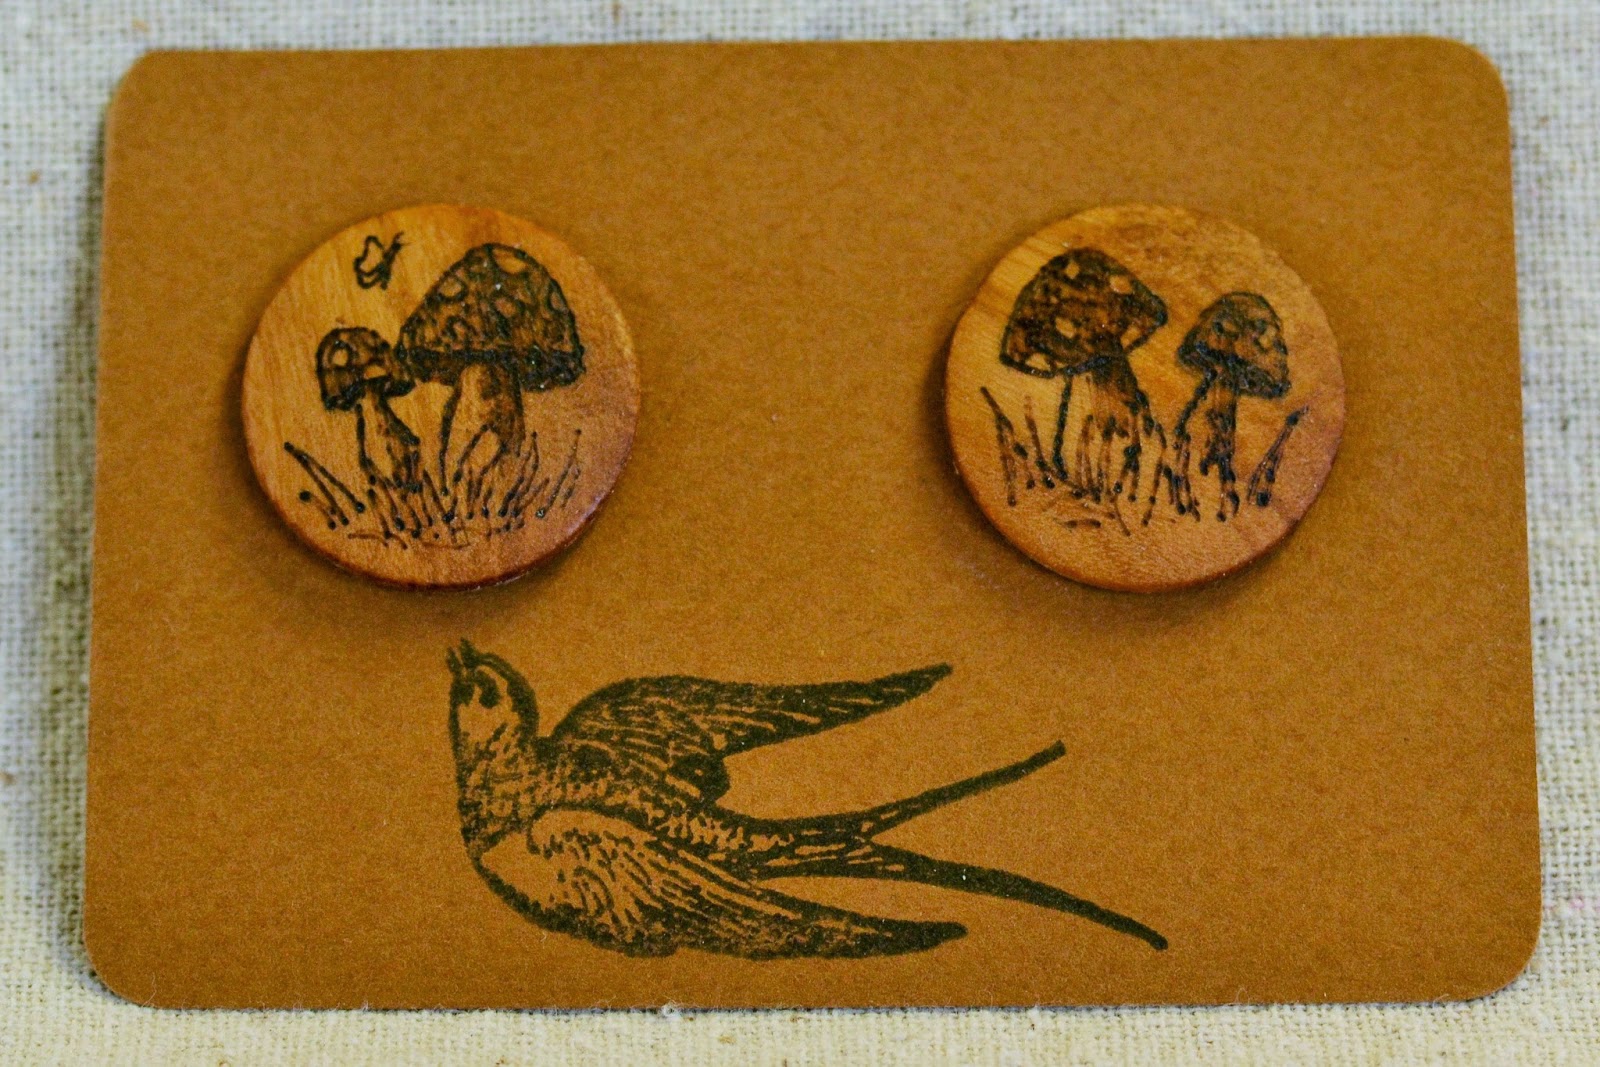
I've been practicing wood-burning a bit on some wooden buttons, which are now in the Etsy shop. And I have nearly finished one of Gemma's birthday gifts, a set of clothing for her favorite baby doll. I still have a couple of pieces I want to finish.
If you haven't done so already, please check out the sponsored giveaway I'm having this week and enter to win some herbal goodness from Twysted Thystle!
I've been practicing wood-burning a bit on some wooden buttons, which are now in the Etsy shop. And I have nearly finished one of Gemma's birthday gifts, a set of clothing for her favorite baby doll. I still have a couple of pieces I want to finish.
Do you craft for stress relief?
Stop by Linda's Creative Friday on Natural Suburbia and see what other crafty folks are doing to decompress.If you haven't done so already, please check out the sponsored giveaway I'm having this week and enter to win some herbal goodness from Twysted Thystle!
Thursday, June 21, 2012
A glue batik sun for the solstice
Being Catholic, we don't really "celebrate" the summer solstice, but we did watch A Midsummer Night's Dream with James Cagney, Olivia de Haviland and Mickey Rooney playing Puck oh-so-wonderfully. And I do love the sun and the long days, if not the humidity of summer. And that is worth at least a hat tip, eh?
I really enjoy how fast and easy glue batik is. I dug out a scrap of white cotton--an old crib sheet, I think--and pinned it to a piece of cardboard in the morning. Then, using that wonderful stuff, Elmer's School Glue Gel, I traced a circle using a plastic bucket lid and free-handed the rest of the sun. And I let it dry.
Then I went at it with acrylic craft paints. Go on and slop the stuff on; in my opinion it looks better than if you try to do a coloring book type, stay-within-the-lines sort of thing. Spatters look right at home on batik. Then I let that dry, too. I probably ought to have put waxed paper between the cloth and the cardboard, as the paint stuck a bit. I was able to soak it off in the next step, but that could be avoided.
Last--the fun part--wash it. You could put it by itself in a wash cycle, but I can't bear running a wash with only one item in it, so I scrubbed it in the sink. Use hot water and a bit of soap, and the glue lines should rub right off. Rinse it well and hang to dry. Make a banner! Make T-shirts! Make a tote-bag! It's lots of fun...
I really enjoy how fast and easy glue batik is. I dug out a scrap of white cotton--an old crib sheet, I think--and pinned it to a piece of cardboard in the morning. Then, using that wonderful stuff, Elmer's School Glue Gel, I traced a circle using a plastic bucket lid and free-handed the rest of the sun. And I let it dry.
Then I went at it with acrylic craft paints. Go on and slop the stuff on; in my opinion it looks better than if you try to do a coloring book type, stay-within-the-lines sort of thing. Spatters look right at home on batik. Then I let that dry, too. I probably ought to have put waxed paper between the cloth and the cardboard, as the paint stuck a bit. I was able to soak it off in the next step, but that could be avoided.
Last--the fun part--wash it. You could put it by itself in a wash cycle, but I can't bear running a wash with only one item in it, so I scrubbed it in the sink. Use hot water and a bit of soap, and the glue lines should rub right off. Rinse it well and hang to dry. Make a banner! Make T-shirts! Make a tote-bag! It's lots of fun...
Friday, February 3, 2012
A huggable gnome doll for a birthday boy
Finally--the Top Secret Birthday Project is revealed! Of course, his birthday isn't officially until Sunday, and we are celebrating tomorrow, but I think it will be relatively easy to keep him away from my blog, since he has absolutely no interest in it.
Adrian loves gnomes, and even has a "gnome-friend" named Thorwald. He sometimes writes letters to him, and a couple of times a year sends his old "Dolly" off to Magic Mountain to hang out with the gnome-folk. Dolly is usually gone for a week or so, and then returns with a little gift from her travels--a pretty stone, an acorn cup or some such thing.
I actually did look on the internet for a gnome doll--not that I would have been able to afford it--but only came up with little wooden and needle felted ones...cute, but not cuddly. I realized I would have to make one myself. I used a great tutorial on making Waldorf dolls for the basis of the doll and ordered a few materials from this great supplier (there was a lot I had on hand already).
I had a bit of a dilemma when it came time to do the face. The Waldorf babies have these tiny little noses and real baby faces, and I needed a old gnome. So, onto the basic head shape, beneath the "skin", I needle felted a big nose and cheeks and a chin. I had to accentuate the nose by sewing the skin fabric down around the nose. I made separate ears from fabric and sewed those onto him.
The hair and beard were the most time consuming, as I had to make felted "mats" for them, attach them to his head and face, and then sew and needle felt the roving to them.
The clothing was the easy bit. I made the cap from some beautiful, 3mm thick merino felt from this Etsy shop. Quality felt isn't cheap, but for a special project you wouldn't want to go with anything but the best, right?
I am sooo looking forward to Adrian opening this gift tomorrow!
For more wonderful, creative pursuits, check out Natural Suburbia and Creative Friday!
Tuesday, November 29, 2011
Rice-filled heating pads--in the nick of time!
We had our first snow this morning, just little flurries drifting, and I couldn't capture them with the camera. We are enjoying hot tea, cocoa and chai, spice cookies, candles and these wonderful rice-filled heating pads I made this weekend for each family member.
They were easy to make and are so appreciated by everyone. About half an hour before bedtime I begin putting them in the microwave to heat, but I am thinking that I might just stick the whole lot of them in the oven on low for half an hour and be done with it!
Here is how I made them: For each pack, I used about 3 1/2 lbs. of cheapo rice from a discount grocery. I poured it into a big bowl and added about 1/2 tsp. of lavender essential oil (for Gemma I used about 10 drops of chamomile essential oil and just about 5 of lavender). I stirred it up really well to distribute the oils, and then poured the rice into a sack I had made from and old sheet. I made sure all seams were sewn double to prevent rice-leakage. The finished dimensions were about 7 1/2 by 15". Then I made a second, decorative cover. I guess I could have made them removable and therefore washable, but my main reason was for identification purposes and to give a second layer of protection from leaks.
These take about six minutes on high in the microwave to heat up, but our microwave may or may not heat very well; I've no way of knowing. The packs stay warm under out covers for several hours.
Just for the sake of comparison, I made my husband one with cherry pits. These are much lighter and better for putting on a muscle ache, since they don't feel like sacks of concrete! Two pounds of cherry pits filled up a sack of the same size, took only 3 minutes to heat in the microwave, but was pretty much cooled off in under an hour. Also, they smell amazing! But for warming the bed, we will stick to the rice bags.
They were easy to make and are so appreciated by everyone. About half an hour before bedtime I begin putting them in the microwave to heat, but I am thinking that I might just stick the whole lot of them in the oven on low for half an hour and be done with it!
Here is how I made them: For each pack, I used about 3 1/2 lbs. of cheapo rice from a discount grocery. I poured it into a big bowl and added about 1/2 tsp. of lavender essential oil (for Gemma I used about 10 drops of chamomile essential oil and just about 5 of lavender). I stirred it up really well to distribute the oils, and then poured the rice into a sack I had made from and old sheet. I made sure all seams were sewn double to prevent rice-leakage. The finished dimensions were about 7 1/2 by 15". Then I made a second, decorative cover. I guess I could have made them removable and therefore washable, but my main reason was for identification purposes and to give a second layer of protection from leaks.
These take about six minutes on high in the microwave to heat up, but our microwave may or may not heat very well; I've no way of knowing. The packs stay warm under out covers for several hours.
Just for the sake of comparison, I made my husband one with cherry pits. These are much lighter and better for putting on a muscle ache, since they don't feel like sacks of concrete! Two pounds of cherry pits filled up a sack of the same size, took only 3 minutes to heat in the microwave, but was pretty much cooled off in under an hour. Also, they smell amazing! But for warming the bed, we will stick to the rice bags.
Friday, October 28, 2011
Making things
This week, between school, household chores and errands, I have been laboring for our Etsy shop to stock the imaginary shelves (um, a big cardboard box in my workroom). My workroom is getting a bit crazy between the Etsy creations and the stuff I am trying to get done for Halloween, Gabriel's birthday, Thanksgiving and Christmas...actually, it is a bit of a disaster right now. But back to the new items:
Watercolor sketchbooks (I have a stack sewn up and ready for covers):
Stitch Markers:
And I finally got these note cards printed up:
Have you made something this week? For a little inspiration, stop by Creative Friday on Natural Suburbia!
Watercolor sketchbooks (I have a stack sewn up and ready for covers):
Stitch Markers:
And I finally got these note cards printed up:
Have you made something this week? For a little inspiration, stop by Creative Friday on Natural Suburbia!
Friday, October 21, 2011
Water-colored Autum Leaves
This was a fun project. I didn't feel up to dipping leaves in beeswax again this year, so I went looking for other ways to decorate for the season. I had such success with the water-colors on coffee filters project last year, that I decided to do a variation on that. Although most of this would be fairly easy for the kids to do (other than the cutting out), my own kids were not involved in it this time around.
I began with spreading out a number of coffee filters on a plastic tablecloth in my workroom. With a spray bottle, I wet them all down with water.
I have really come to love these liquid water colors I ordered a couple of years ago. The colors are quite vivid, and they are so much easier to work with than the pan or tube colors for things like this. I just took the bottles in yellow, green, orange, red and brown and proceeded to dribble and drop paint onto the wet coffee filters.
I'm afraid the colors look all wonky because of the blue tablecloth. Next time I do something like this for the blog I will try to remember to use white! Anyway, I downloaded and printed out an autumn leaf template I found on the internet, and cut out the leaves. I pinned a leaf to a stack of several filters, and cut them out.
When I had a nice pile of each type of leaf, I took a brown Sharpie marker and drew the simple veins on each leaf. Then I threaded them onto sturdy button thread and put them up in a couple of places. I left a few unstrung to tape with double-stick tape to our french doors.
For more creative inspiration, why not stop by Natural Suburbia for Creative Friday?
I began with spreading out a number of coffee filters on a plastic tablecloth in my workroom. With a spray bottle, I wet them all down with water.
I have really come to love these liquid water colors I ordered a couple of years ago. The colors are quite vivid, and they are so much easier to work with than the pan or tube colors for things like this. I just took the bottles in yellow, green, orange, red and brown and proceeded to dribble and drop paint onto the wet coffee filters.
I'm afraid the colors look all wonky because of the blue tablecloth. Next time I do something like this for the blog I will try to remember to use white! Anyway, I downloaded and printed out an autumn leaf template I found on the internet, and cut out the leaves. I pinned a leaf to a stack of several filters, and cut them out.
When I had a nice pile of each type of leaf, I took a brown Sharpie marker and drew the simple veins on each leaf. Then I threaded them onto sturdy button thread and put them up in a couple of places. I left a few unstrung to tape with double-stick tape to our french doors.
For more creative inspiration, why not stop by Natural Suburbia for Creative Friday?
Subscribe to:
Posts (Atom)